
Craving an effortless curly style that blends perfectly with your natural hair? Freetress Island Twist Crochet Hair might be just what you need! It’s a go-to choice for protective style lovers thanks to its soft texture, realistic appearance, and hassle-free installation. Whether you’re new to crochet hairstyles or already a pro, this guide will show you how to make the most of this fabulous hair option. “Freetress Island Twist Crochet Hair”
So, what exactly is Freetress Island Twist Crochet Hair?
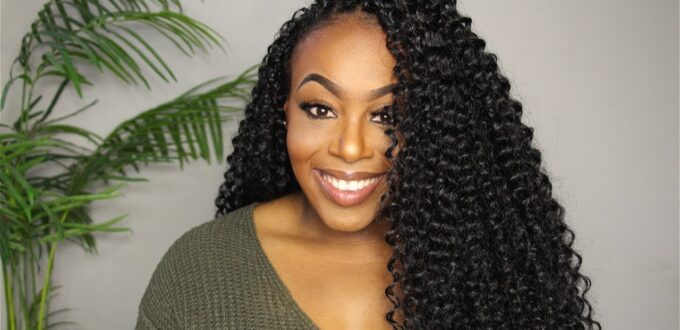
Think of it as your shortcut to a full, bouncy, island-inspired look minus the stress. Freetress Island Twist is made from high-quality synthetic fibers that look and feel just like the real thing. The best part? It’s pre-looped, which means even beginners can install it with ease. Available in different lengths and shades, it’s super versatile and suits all kinds of styles and preferences.
See also…Easy Hairstyles for Fine Curly…
Why People Love It: Key Features
Here’s why so many love using Freetress Island Twist:
- Looks Natural: The synthetic fibers are crafted to resemble real hair, giving you a soft, bouncy, natural finish.
- Pre-Looped for Easy Install: Makes installation quicker and easier—even if you’re new to crochet styles.
- Tons of Color Options: From classic black to ombré blends, you can match your natural shade or go bold.
- Various Lengths: Common lengths include 18″ and 20″, giving you freedom to choose the look you love.
- Some Heat Resistance: Select styles can handle low-heat tools, but always double-check the label.
Benefits of Using Freetress Island Twist
So what makes this hair a go-to for so many? Let’s break it down:
- Quick & Easy Install: Thanks to its pre-looped design, installing this hair is a breeze.
- Time Saver: Spend less time doing your hair and more time slaying it.
- Protects Your Natural Hair: It’s a great protective style that keeps your natural strands safe from heat and daily manipulation.
- Versatile: Whether it’s a casual day out or a dressy event, this hair adapts beautifully.
- Low Maintenance: Once installed, it needs minimal upkeep perfect for busy lifestyles.
How to Install Freetress Island Twist Crochet Hair
Don’t worry installing this hair is simpler than you think. Here’s a step-by-step:
- Prep Your Hair
Start with clean, conditioned hair and braid it into cornrows. These braids act as the base for the crochet hair. - Use a Crochet Needle
Slide the crochet hook under a braid, attach the pre-looped hair, and pull it through. - Secure It
Loop the ends of the hair through the pre-loop and pull to tighten. - Repeat
Keep going until your entire head is covered and you’re happy with the volume.
Here is Step-by-Step Guide
Want to rock a flawless curly crochet style? Here’s how to install Freetress Island Twist Crochet Hair the right way from prep to finish.
Step 1: Prep Your Natural Hair
What to Do:
- Wash and deep condition your hair to keep it clean and healthy.
- Stretch or blow-dry your hair if needed for easier braiding.
- Part your hair into neat, cornrow braids straight back or in a pattern of your choice.
Pro Tip: Make sure your braids are firm but not too tight you don’t want to damage your scalp.
Step 2: Get Your Tools Ready
You’ll Need:
- Pre-looped Freetress Island Twist Crochet Hair (5–7 packs for a full head)
- A crochet latch hook needle
- Moisturizer or leave-in conditioner (optional)
- A mirror (for better visibility if installing on your own)
Step 3: Insert the Crochet Needle
How to Do It:
- Slide the latch hook needle under a braid (from front to back or side to side).
- Make sure the latch is open before inserting.
Step 4: Attach the Hair
Here’s How:
- Hook one loop of the pre-looped crochet hair onto the latch.
- Close the latch and pull the loop halfway through the braid to create a small hole.
Step 5: Secure the Hair
Now Secure It:
- Take the ends of the hair and pull them through the loop.
- Gently pull to tighten it at the base of your braid.
Optional: Repeat the knot one more time for extra security.
Step 6: Repeat Across Your Head
What to Do:
- Keep moving row by row until your entire head is filled.
- Fill in any gaps to get your desired fullness and shape.
Pro Tip: For a more natural look, space the hair out more in the back and pack it fuller at the top/front.
Step 7: Final Touches
Time to Slay:
- Trim the ends if needed to even things out.
- Fluff or separate curls gently for volume.
- Add some edge control or gel to your edges for a polished finish.
Your new curly crochet style is in, and you’re ready to shine! Whether you’re heading to brunch or a big event, Freetress Island Twist gives you the bounce, beauty, and convenience all in one.
Maintenance Tips: Keep It Fresh
Want your style to last and look amazing every day? Here’s how to take care of it:
- Wrap It at Night
Use a satin or silk scarf or bonnet to reduce frizz and keep curls bouncy. - Light Moisture
Apply a light leave-in spray or mousse to keep the hair soft and defined. - Avoid Heavy Products
Stay away from thick oils and creams that can weigh down the curls. - Handle Gently
Don’t tug or over-comb. These curls do best with a little TLC.
Styling Ideas: Make It Your Own
Get creative with your look:
- Updos: A curly top knot or high ponytail can look super chic.
- Half-Up Styles: Keep it fun with a half-up, half-down look.
- Add Accessories: Think beads, clips, headbands—go wild!
- see also…How to Cut Curtain Bangs Brad
Conclusion
If you’re looking for a protective style that’s easy to install, low on maintenance, and big on style, Freetress Island Twist Crochet Hair is a fantastic option. With its natural look and feel, you can rock beautiful curls that last for weeks. Whether you’re dressing up or keeping it casual, this hair has your back!
Frequently Asked Questions (FAQs)
Q1: Can I wash Freetress Island Twist Crochet Hair?
A1: Yes! Use a gentle shampoo and rinse thoroughly. Always let it air dry fully to maintain the curl pattern.
Q2: How long does the hairstyle last?
A2: With proper care, it can last 4 to 6 weeks.
Q3: Is it safe for kids?
A3: Absolutely. It’s lightweight and soft, making it a good option for children’s protective styles.
Q4: Can I use heat to style it?
A4: Some types are heat-safe, but not all. Always check the packaging before using any heat tools.
Q5: How many packs do I need for a full head?
A5: Usually, 5 to 7 packs are enough, depending on how full you want your style.
No Comments Yet